

If you sew, a dog crate can feel like an unfinished thought sitting in the room. Clean lines, hard edges, no personality. It’s easy to imagine how a well-made cover could soften it, quiet it down, and make it feel more considered. With fabric on hand and a machine nearby, sewing one yourself seems like a natural next step.
What often surprises people is how quickly a crate cover moves beyond “simple sewing project.” A crate isn’t flat. It has corners that need structure, doors that need clearance, and proportions that don’t forgive shortcuts. Fabric that looks perfect on the table behaves differently once it’s hanging, and small missteps show up immediately.
Knowing what you’re actually taking on changes the experience. Whether you enjoy the challenge from start to finish or realize partway through that you’d rather hand it off, understanding the process makes every decision more deliberate — and the outcome, whatever it is, far more satisfying.
What You’ll Need Before You Start Sewing
Before you even thread your sewing machine, a successful project begins with thoughtful preparation. The allure of jumping straight into cutting and sewing is strong, but taking the time to gather the right tools and materials will save you a significant amount of frustration later. A well-made crate cover needs to be durable, safe, and functional, and the supplies you choose are the foundation for achieving that quality.
Think of this stage like gathering ingredients for a recipe. You wouldn’t start baking without making sure you have flour and eggs. Similarly, you shouldn’t start a sewing project without the right fabric, thread, and measuring tools. Rushing this step often leads to makeshift solutions halfway through the project, which can compromise the final result. Setting up your workspace with everything you need allows you to focus on the creative process without interruption.
Tools, Fabrics, and Supplies That Actually Matter
While you can get by with the basics, a few specific items will make the process to sew a dog crate cover much smoother and the outcome more professional.
Fabric: This is your most important choice. You’ll need a durable, breathable, and machine-washable fabric. A medium-to-heavyweight cotton canvas is an excellent option. It’s sturdy, holds its shape well, allows for good airflow, and is relatively easy for a home sewing machine to handle. Avoid flimsy, stretchy, or slippery fabrics, as they are difficult to work with and won’t provide the structure a cover needs. You’ll also need enough yardage to cover the top and all four sides, plus extra for seam allowances and potential mistakes.
Sewing Machine and Needles: A standard sewing machine should be able to handle canvas, but make sure you have the right needle. A “denim” or “heavy-duty” needle (size 90/14 or 100/16) is essential to punch through thick fabric without breaking.
Measuring Tools: A flexible tailor’s tape measure is good for curves, but a rigid metal tape measure (like one from a hardware store) is best for getting accurate crate dimensions. You’ll also want a large cutting mat, a rotary cutter, and a long acrylic ruler for cutting straight, precise lines. Using scissors for long cuts on heavy fabric can lead to jagged edges.
Thread: Don’t use old or low-quality thread. Choose a high-quality, all-purpose polyester or a heavy-duty thread that matches your fabric. Weak thread can lead to popped seams after just a few washes.
Closures: You’ll need a way to secure the roll-up panels. Simple fabric ties are a classic option. You could also use toggles or sturdy snaps if you’re comfortable installing them. Avoid Velcro, as it clogs with pet hair and loses its grip over time.
Measuring a Dog Crate Accurately Before Cutting Fabric
This is the most critical and unforgiving step in the entire process. A small error in measurement at this stage can have a ripple effect, resulting in a cover that is too tight to fit, too loose to look neat, or crooked in its final form. Unlike a simple blanket, a fitted cover has no room for error. The temptation is to take a quick measurement and get to the fun part, but this is where you need to be methodical.
Measure everything twice—or even three times—before you mark your fabric. Write down your numbers clearly and double-check your math when adding seam allowances. Remember that a wire crate isn’t a perfect geometric box. It has rounded corners, slight bows in the wire, and plastic trays that can alter the dimensions at the base. These small imperfections must be accounted for.
Why Small Measurement Errors Create Big Fit Problems
Accuracy is everything when it comes to sewing a structured item. Here’s how to measure a dog crate correctly and why it matters so much.
The Three Dimensions: You need three core measurements: width, depth (length), and height.
- Width: Measure from the outside edge of the wire on the left to the outside edge on the right.
- Depth: Measure from the front-most wire to the back-most wire.
- Height: Measure from the very top of the crate down to where you want the cover to end. For an indoor cover, this is usually the bottom of the wire frame, just above the plastic tray.
The Seam Allowance Trap: Once you have your crate dimensions, you must add a seam allowance to every piece you cut. A standard seam allowance is 1/2 inch. This means for a single panel, you need to add 1 inch to the total width and 1 inch to the total height to account for the seams on all sides. Forgetting this step is the most common reason a DIY cover ends up too small to fit over the crate.
Ignoring the “Play”: While you want a fitted look, the cover needs a little bit of “play” or “ease” to slide on and off without a struggle. A good rule of thumb is to add an extra 1/2 to 1 inch to your final width and depth measurements (after adding the seam allowance). This tiny bit of extra room makes a huge difference in usability without making the cover look baggy. Without it, you might find yourself fighting to pull the cover on and off, stressing the seams each time.
Common Sewing Mistakes That Affect Fit and Function
Even with perfect measurements, the sewing process itself presents several opportunities for things to go wrong, especially for a beginner. A crate cover looks like a simple box, but constructing a three-dimensional object from flat pieces of fabric requires precision. The most common DIY dog crate cover mistakes often aren’t about complex techniques but about a lack of consistency in the basics.
These errors can turn a promising project into a frustrating puzzle. A seam that isn’t straight can cause a panel to pucker. A corner that isn’t properly reinforced can tear under stress. Being aware of these common pitfalls can help you avoid them and achieve a much cleaner, more durable result.
Where Most First-Time Projects Go Sideways
Here are a few sewing dog crate cover tips to help you steer clear of common frustrations:
Inconsistent Seam Allowances: If one seam is 1/2 inch and the next is 3/4 inch, your panels won’t line up. This will cause the finished cover to twist or hang unevenly. To prevent this, use a magnetic seam guide on your sewing machine or mark the seam line with a fabric pen before you sew. Consistency is key.
Not Finishing Seams: Heavy canvas frays. If you don’t finish your internal seams (using a serger, a zig-zag stitch, or pinking shears), the fabric will unravel with every wash. This will eventually lead to holes and a cover that falls apart from the inside out.
Stretching the Fabric While Sewing: When you guide the fabric through the machine, let the machine’s feed dogs do the work. Don’t pull or push the fabric. Pulling can stretch the fabric out of shape, especially on long seams, resulting in a wavy, distorted panel that no amount of ironing can fix.
Improperly Constructed Corners: The corners are the primary stress points. To create a strong corner, sew your panels together, press the seams open, and then topstitch on the outside for reinforcement. Simply sewing two pieces together without reinforcement is a recipe for a torn seam down the line.
The Real Time Investment of Sewing a Crate Cover
On Pinterest or in a quick blog post, sewing a crate cover can look like a fun afternoon project. In reality, creating a well-made, fitted cover is a significant time commitment, even for an experienced sewer. It’s important to go into the project with a realistic understanding of the hours involved to avoid feeling discouraged.
The actual time spent at the sewing machine is often only a fraction of the total project time. The preparation and finishing stages are just as, if not more, time-consuming. Underestimating the full scope is a common reason that half-finished DIY projects end up in a bag in the back of a closet.
Planning, Cutting, Sewing, and Adjusting
Let’s break down the typical time investment and answer the question: how long does it take to sew a crate cover?
Planning and Measuring (1-2 hours): This includes accurately measuring the crate, sketching out your pattern pieces, calculating fabric yardage, and adding seam allowances and ease. Don’t rush this part.
Fabric Preparation and Cutting (2-3 hours): First, you should wash, dry, and iron your fabric to pre-shrink it. If you skip this, your cover could shrink in the first wash and no longer fit. Then, laying out large pieces of heavy fabric, ensuring the grainline is straight, and cutting precisely is a slow, meticulous process. This is often the most physically demanding part.
Sewing the Main Body (3-5 hours): This involves sewing the main panels together, finishing all the internal seams, and pressing as you go. Sewing long, straight seams on heavy fabric takes concentration to keep them from veering off course.
Creating and Attaching Panels/Doors (2-4 hours): This is where it gets more complex. You’ll need to hem the roll-up panels, create and attach the fabric ties or toggles, and then carefully attach these panels to the main body. This requires careful alignment to ensure the doors hang straight.
Finishing (1-2 hours): This includes hemming the bottom of the cover, topstitching for reinforcement, and giving the entire cover a final press.
Totaling it up, a conservative estimate for a first-time project is anywhere from 9 to 16 hours. For someone who values their weekend time, this homemade dog crate cover effort can be a much larger commitment than initially expected.
Why Many Pet Owners Switch to Custom After Trying DIY
There is immense satisfaction in completing a DIY project. But there is also a point where the frustration of a project that isn’t turning out right, or the sheer amount of time it’s consuming, can outweigh the initial appeal. Many thoughtful pet owners who start with a DIY cover eventually find their way to a professionally made one.
This isn’t a sign of failure. On the contrary, the DIY process is often an invaluable education. It teaches you to appreciate the details that make a product work well. You learn firsthand why a precise fit is not just about aesthetics, why fabric choice is crucial for safety, and why professional finishing makes a product last. When you’ve wrestled with these challenges yourself, the value of a custom dog crate cover becomes crystal clear.
Fit, Fabric Behavior, and Finish Are Harder Than They Look
When you compare a custom vs. a DIY dog crate cover, the difference often lies in the mastery of three elements that are surprisingly difficult to perfect at home.
Fit: Achieving a perfectly tailored fit without puckers or twists on a three-dimensional object requires experience. A professional maker has patterns and techniques honed over hundreds of projects to ensure a crisp, structured fit that a first-timer can rarely replicate.
Fabric Behavior: A made-to-order crate cover is crafted from materials specifically sourced for the job. The maker knows exactly how that fabric will hang, wear, and wash. This expertise removes the guesswork and risk of choosing a material that looks good on the bolt but fails in practice.
Finish: Professional-grade equipment, like industrial sewing machines and sergers, creates seams and hems that are far more durable than what most home machines can produce. The clean topstitching, perfectly aligned panels, and reinforced stress points are the hallmarks of a product built to withstand years of daily use and washing. For many, the time and stress saved is well worth the investment.
Questions People Ask Before Sewing a Dog Crate Cover
Is Sewing a Dog Crate Cover Beginner-Friendly?
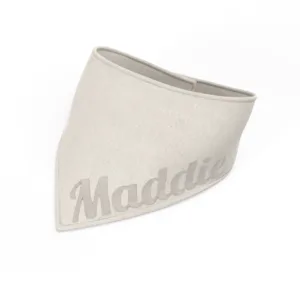
Honestly, it’s an intermediate-level project. While it mostly involves straight lines, the project’s large scale, the need for precision with heavy fabric, and the three-dimensional construction make it challenging for a true beginner. A smaller project, like a pet bandana or a simple pillow, is a better place to start to build your skills.
What Fabric Is Easiest to Sew for a Crate Cover?
A medium-weight, 100% cotton canvas or a sturdy cotton duck cloth is the most forgiving option. These fabrics are stable (they don’t stretch), they press well, and they are easy to mark. They are also breathable and durable. Avoid anything too thick that will tax your machine, and stay away from lightweight or slippery fabrics that are hard to control.
When Does Custom Make More Sense Than Sewing It Yourself?
Custom makes more sense when your time is more valuable than the money you might save, or when the quality and safety of the final product are your top priorities. If you don’t own a sewing machine, if you have limited free time, or if the thought of a multi-day project feels overwhelming, ordering a custom cover is a practical choice. It guarantees a professional, safe, and beautiful result without the learning curve and time commitment of a complex DIY project.
0 Comment